Tuesday, May 18, 2010

My Granma's Scotch Shortbread

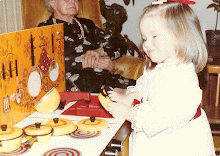
My mother's mother was born in Calder Bank, Scotland and came to the U.S. as a little girl.  Her real name is Anne, but as far as I know, everyone has always called her Nancy.  Of course, I call her Granma.  (And, no, that is not a typo -- she does not put the "d" in grandma.) 

The first thing you need to know about my Granma is that she is tiny.  Exceptionally tiny.  Today, at nearly 92 years old, she is only about 4'9" tall.  My uber-tall, preschool-age daughter finds it endlessly fascinating that she is nearly as tall as her great-grandmother. 

Her small stature and the ever-present twinkle in her eye always made my Granma seem vaguely magical, to me, when I was growing up.  This impression was only enhanced by the fact that she had a Secret-Garden-like backyard (with small gates, brick walls, terraced steps, and lots of ivy), a hidden room in her basement (full of my grandfather's collections), and often spoke in completely serious tones about the mischievous "wee folk"  -- especially one named Jasper.  She is warm and sweet and has always made me feel adored. 

But lest you get the wrong impression, let me also tell you that beneath that soft exterior, my Granma is also smart, tough, precise, and practical.  She does crossword puzzles in pen and her handwriting -- even today -- is as neat as a typewriter.  She was a divorced mother of two girls who also had an intense career as an OR nurse.  She has little patience for those who wallow in self-pity and she does not engage in wistful sentimentality.  At nearly 92, she still drives and lives independently -- and comes from a long line of strong, long-lived Scottish women. 

The other essential thing to know about my Granma is that she has an impeccable sense of style, both in regard to dressing herself and decorating her home.  Yes, she's nearly 92, but I would still seek her opinion before I purchased items for my house, if I lived near her.  She is one of those people who has a remarkable knack for taking a piece of jewelry -- or furniture -- and using it in an unexpected but perfectly delightful way.  I once gave her a rose-shaped brooch made of red tartan fabric, expecting to see it on the lapel of her winter jacket.  She turned up at Christmas wearing it centered at the point of her white v-neck shirt.  It looked marvelous.  And she is the only person I know who had the vision to put a large, folding, black wrought iron gate in the open doorway between her dining and living rooms.  Yet once you've seen how charming that gate is, you wonder why you haven't seen it everywhere.

And my food-memories of my Granma Scott?  She drinks a "cuppa" multiple times a day and used to make me my own cup of weak, milky tea before school in the morning.  She puts butter on just about everything -- even the saltine crackers she would set adrift on my lunchtime bowl of tomato soup.  She used to keep Kit-Kat bars next to her chair, in with her knitting needles and yarn.  And she has always been my baking grandmother. To this day, my very favorite chocolate chip cookies, apple pie, and shortbread are my Granma's versions. 

This is my Granma's recipe for shortbread.  I have a copy of this recipe handwritten by my great-grandmother, Grace Reid, and it differs slightly from the one my Granma gave me;  my great-grandmother used 1/2 cup more flour than my Granma.  But other than that discrepancy, I haven't dared to change anything, not even the slightly outdated title, "Scotch Shortbread."  (I realize that the more modern adjective would be "Scottish," but how dare I alter what my ancestor from Scotland saw fit to call herself?) 

Shortbread could not be simpler to make (three ingredients!), packs well, and keeps for days in an airtight container.  Thus, this is my go-to cookie recipe.  This recipe produces a very buttery, crumbly shortbread.  If you like your shortbread tender, bake it for the least amount of time called for below.  If you prefer a harder, ready-for-dunking-in-tea shortbread, go for the longer bake time.  (I go for the shorter time, but my Granma makes hers very hard.) 

One last note:  my Granma insists on only Land O' Lakes butter.  I've used that brand many times, but have also had great results with other, high-end butters (Plugra, Kerrygold, Horizon Organic).  Just use a good butter with a pronounced, buttery flavor that you enjoy;  do not buy the cheapest butter at the store, or your shortbread's flavor will be lacking.

SCOTCH SHORTBREAD
Source:  Grace Reid & Nancy Scott
Makes:  about 3 1/2 dozen small cookies
Time:  about 10 mins. prep time and 1 hr. unattended baking time

  • 3 sticks butter, at room temperature

  • 3 cups flour

  • 1 c sugar

  1. Preheat the oven to 350.

  2. Using your hands, mix the ingredients together until it works into a ball. (It will be sticky and your hands will be a mess . . . take your rings off first!)

  3. Spread the dough evenly in a 9x13 inch baking dish.  (If you are having trouble with the dough sticking to your hands, you can use a piece of waxed or parchment paper, sprayed with Pam, to help you push it into place.)  Using a fork, deeply prick the shortbread all over the top.  I perforate in nice, evenly spaced, close together rows, to keep it pretty.

  4. Bake at 350 for 15 mins., then  lower the temp to 325 and bake for another 30-45 mins.  The shortbread will be light gold to a deep, toasted wheat color on top, when done (depending on how long you bake it).

  5. Remove the pan from the oven and immediately use a butter knife to cut the shortbread into small squares.  Do it right away; the dough will be too hard to cut later.  Let cool in the pan for a bit, then remove to a wire rack to cool completely.
Long may your lum reek and your kettle boil!*
Enjoy!
M

*A Scottish blessing my Granma used to close letters to me when I was studying abroad in college.  "Lum reek" = "chimney smoke"

Friday, April 9, 2010

The One-Pot Meal: Jambalaya

Oy.  I have been derelict in my blogger-duties.  I completely neglected to post Part Three of the "Learn to Cook" series last month. Mea culpa.  The good news is that Parts Three and Four are related and so I promise to bring them to you one after the other, starting now. 

In Part Three of our "Learn to Cook" series, we are going to take a step beyond the pasta toss and try to do a little more actual cooking.  But we'll still keep it simple by sticking to just one pot.  Cooking is much less intimidating if you only have one pot on the stove to monitor.  No need to worry that your sauce will burn while you were concentrating on sauteing the meat or tending to the veggies roasting in the oven.  For beginners (or for experienced cooks who happen to have distractions, like, say, a three year old who is using your legs as a tunnel for his cars), knowing that you just have one pot on the stove, happily bubbling away, can be comforting and confidence-building.

For this month's recipe, I've chosen to give you my 30-minute version of jambalaya.  I've made "real" jambalaya before, and it was completely and utterly wonderful.  But it also required a lot of time on the stove.  Then, about a decade ago, I discovered a recipe for 20-minute jambalaya in Desperation Dinners, by Beverly Mills and Alicia Ross.  It still had all the great, Louisiana flavors -- spicy sausage flavoring those good old staples, rice and beans -- but was on the table in 20 mins.  Over the years, I have altered the recipe a bit (mainly using Emeril Lagasse's jambalaya recipe from Potluck), in favor of starting with a "Cajun mirepoix" and fresh thyme.* It is still ready in about 30 minutes and the hardest part is chopping the veggies -- and how hard is that?

One note for the beginners out there:  Don't be intimidated by the long-ish list of ingredients.  You mostly just dump them into a pot and let them sit.  And don't be intimidated the list of spices/herbs, either.  All of these (bay leaves and oregano, especially) are worth having in your pantry, as they provide the flavor backbone of many, many meals.  And if you don't want to buy something, just leave it out.  The only things I wouldn't dream of leaving out are the rice, beans, sausage, and thyme. 


JAMBALAYA
Source:  adapted from Desperation Dinners, Beverly Mills & Alicia Ross;  Potluck, Emeril Lagasse
Serves:  6
Time:  30 mins.
  • 1 tsp butter
  • 1 large onion
  • 1 large bell pepper
  • 2-3 stalks celery
  • 2-3 cloves garlic
  • 8 oz.-1 lb. kielbasa or andouille sausage
  • 1 3/4 c rice
  • 1 can chicken broth
  • 1/4 c white wine (or more water)
  • 3 bay leaves
  • 4 sprigs fresh thyme
  • 1/2 tsp onion powder
  • 1/2 tsp. dried oregano
  • 1/2 tsp. black pepper
  • 1 can white beans
  • 1 can black beans
  • 1 can stewed tomatoes
  • Optional ingredients:  hot sauce to taste, green onions for garnish, cubed ham, cooked shrimp, chicken
  1. Chop the onion, green pepper, and celery.  You should have about 1 c. of each, but there is no need to measure -- just eyeball it.  Melt the butter in a large pot or skillet that has a lid.  Add the veggies and cook until they begin to soften -- about 2 mins.  Add the garlic and cook for another 2 mins., stirring often. 
  2. Cut the sausage into 1/4-inch thick slices and add to the pot, cooking for another 2 mins. or so. 
  3. Add the rice and stir to blend, cooking for another minute or two.  Add the chicken broth and wine, stirring to moisten all the rice.  Add the thyme and bay leaves.  Cover the pan and cook until the rice is getting tender (5-15 mins., depending on what type of rice you used). 
  4. Meanwhile, combine the onion powder, oregano, and black pepper in a little cup.  Rinse and drain the beans. 
  5. Add the spice mixture, beans, and tomatoes to the pot.  Cover again and let cook until the rice has absorbed most of the liquid and the flavors have blended -- about 10 mins.  Taste and adjust seasonings. Serve.
  6. Note on optional ingredients:  Jambalaya comes in as many forms as there are cooks in Louisiana kitchens.  So if you simply have to have chicken, or ham, or shrimp in your jambalaya -- add it!  If you are starting with raw chicken, I'd add it (cut into bite-sized pieces) to the pot first, brown it in some oil or butter, then remove it from the skillet and proceed with the recipe.  (Add it back in with the beans.)  If you are adding ham, I'd add that with the sausage.  Cooked shrimp?  With the beans.  And in our house, we don't add any hot sauce to the pot, because this is one of our kids' favorite meals, but they can't take the spice.  But Matt and I pass the bottle of hot sauce back and forth at the table, like a ping-pong match. 
I recommend serving this with a simple green salad or, for those ready for more than one kitchen task at a time, roasted carrots or cauliflower.  Add a crusty loaf of French bread and wine, naturally.  And if you've got kids who might be adverse to trying something new, may I suggest having a "dinner-and-a-movie" night and serve this while watching the just-released The Princess And The Frog?  If that movie doesn't have you craving Creole cooking, I don't know what will.  It's got me wanting to make gumbo and etouffee next! (And lucky for me, my husband's old college roommate is from N.O. and just shared his shrimp etouffee recipe with me!  I'll keep you posted . . .)

Enjoy!
M

Other one-pot recipes on this blog: Super Bowl Chili and Quickie Shepard's Pie (only uses one pot if you have an oven-proof skillet and don't have to transfer to a casserole dish). 
*In case inquiring minds want to know: What is a mirepoix?  A mirepoix is a combination of three "aromatics" -- vegetables -- sauteed to create a base of flavor on which to build a dish.  In fact, the repeated use of a specific mirepoix in a given culture is what lends a consistent, common, underlying taste to all of the traditional dishes of that culture. Traditionally, in French cuisine, a mirepoix is made up of onions, celery, and carrots -- usually sauteed in butter.  In Cajun/Creole cuisine, green peppers take the place of the carrots in the trinity of vegetables. 

Friday, March 12, 2010

Kale-ing Me Softly: Roasted Kale and Kale Smoothies

I have a confession to make. [Big breath.]

I have not, historically, enjoyed my leafy greens. 

I know, I know!  It's embarrassing!  They are so incredibly nourishing, so healthful - how could I turn up my nose at such a nutritionally perfect food?  And so many foodies gush over their favorite steamed/sauteed/squirted with lemon/tossed with bacon/stewed with garlic versions.  But I just simply did not enjoy them.  I found them unpleasantly bitter and chewy, the flavor too assertive.  

But, oh, how I wanted to love them!  They were all so lovely, beckoning at the farmer's market.  The chard with its stems in a brilliant rainbow of jewel-tone colors, the kale with its frilly, curly leaves.  I wanted to be the one at the market with those gorgeous greens lounging across the top of my basket.  Yet I always walked on by, and anytime I saw a new recipe involving a leafy green, I sighed and turned the page.  It wasn't meant to be.

Until now! 

I have seen the light!  In the past month, I have been eating kale like it's going out of style, thanks to two of my dearest girlfriends/cooks, Heather and Sarah.  (And with a little help from the amazing kale from Be Wise Ranch, here in San Diego.)  So here are the two recipes that have turned me from kale-phobic into kale-fanatic.  Now that I'm head over heels for these two versions of kale, I'm ready to venture forth and try some of those kale (and chard, beet greens, mustard greens, collard greens, etc.) recipes I've been ignoring.  I'll let you know how it goes . . .

HK'S ROASTED KALE
Heather is one of my college girlfriends and although we don't get to see each other very often, I get the joy of "hearing" her voice when I read her blog, Stumptown Sisters.  And despite me never mentioning my love for Orangette to Heather, she gave me Molly Wizenberg's book, based on that blog, as a gift.  So, obviously, I trust that Heather's cooking style and tastes will dovetail with mine.  When I did my recent post about roasted cabbage, Heather left a comment suggesting I try roasting kale.  Well, given my intense love of all roasted veggies, I knew that this was my big chance to finally fall in love with a leafy green.  And, wow!  This is so good.  It makes an excellent snack -- Heather says it's as good as popcorn, but to my mind, it's more like eating potato chips.  I've eaten an entire bunch of kale while my kids were snacking on buttered popcorn and I never even once had the desire to dip into their popcorn bowls.  It really is that good.  (And if you aren't convinced yet, let me tell you that my mom, who, God love her, is not exactly a health food or veggie lover, thought this was delicious!)
  • 1 bunch kale (I've used both green and purple curly-leaf kale, but I'm sure any of the varieties of kale would work fine)
  • olive oil
  • sea salt and freshly ground pepper
  1. Wash and dry your kale leaves.  Pull the tender leaves off of the tough stems and put them on a rimmed baking tray.
  2. Drizzle the leaves with some olive oil.  You want enough to just coat them, so that they are all glistening, but not so much that they are drowning in a pool of oil.  Generously salt and pepper the leaves.
  3. Roast at 400 (or 425 or 450 -- it doesn't much matter what temp), tossing them around every now and again, until the leaves are starting to get crispy.  I like mine fairly close to being burnt -- darker than depicted in the photos below.  The leaves get papery and crispy and as addictive as potato chips.  I also like mine with a pretty hefty dose of pepper, but use your own taste as a guide, here.  I serve them piled high on a platter.  And I'm not ashamed to say that I just use my fingers, if I'm snacking. 

Note:  I think that this has the potential to be a kid-pleasing veggie preparation, with one caveat:  go easy on the pepper!  I called it "leaf chips" and got my 5 yr. old to take a bite (always the biggest hurdle with a new veg), but she spit it out, saying it was too spicy -- and now she won't try it again.  I wish I had given it to her with just a lot of salt, and then added pepper to the portion on my plate. 


SARAH'S SUPER SMOOTHIE
My next great kale adventure came in the very surprising form of a smoothie.  My friend Sarah has been touting the deliciousness and health benefits of her "green smoothies" ever since I met her two years ago.  And I've even seen her kids drink them down.  But a smoothie made with kaleSeriously?  It just never sounded appealing to me.  And then my son got a nasty cold just 5 days before his third birthday party and I wanted to try anything and everything I could to boost his immune system and get him healthy in time to enjoy his birthday.  Well, I wasn't lucky enough to get him to fall in love with the smoothie -- he refused to try it because it was green (which makes zero sense, since he adores guacamole and eats salad).  But I fell in love, instead.  Here is the basic recipe.
  • 2-5 leaves kale (start with 2 and work your way up from there)
  • a handful of parsley (Sarah says about 1/4 of a bunch;  I just cut a handful from my garden)
  • 1 apple
  • 1 orange
  • 1 banana
  1. Wash all your produce.  Pull the tender kale leaves off of the tough stems and put them in the blender.  Pluck the leaves of parsley (and some small stems are fine, too) and add them to the blender.  Add a splash of water and blend the greens. 
  2. Core and chop the apple; peel and chop the orange;  peel and chop the banana.  Add all three to the blender and mix.  This makes a very thick smoothie, but you can thin it with water to your desired consistency.  I thin it just a bit and serve with a spoon.  This makes enough for at least two servings, although I often eat the entire thing over the course of a morning (or afternoon, if I'm having it for lunch). 

Note:  As I said, Sarah's kids drink this, so if your kids can get past the green color, this could be a great way to get in a bit of veggies.  You could start with just one kale leaf and all their favorite fruits, even.  Also, you can play with the recipe quite a bit.  Sarah has added mangoes, berries, and other fruits that she has on hand.  I have tried it without each of the three fruits listed above and, although I like the combo of all three best, I think the only essential one is the apple.  It just wasn't quite as tasty without the apple. 

Enjoy!
M

PS  Lyn, that title pun was for you! ;-)