Wednesday, October 6, 2010

(Whole Wheat, Flax Seed, Sweet Potato) Chocolate Chip Pancakes

So, we officially have a kindergartner in my house.  We are now part of that world of busy, rushed mornings in which you have about 28 minutes to feed two children a healthy, hearty breakfast; dress one child while reminding the other to dress herself; put finishing touches on two lunchboxes and zip them into two backpacks; beg two children to put on the shoes you have so thoughtfully laid out for them; brush and style one child's hair while she whines;  thank heaven that child #2 is a boy who's hair requires zero attention; hand out two toothpasted toothbrushes and hope that they manage to brush at least 50% of their teeth; help zipper and button two jackets; and, finally, buckle two children into carseats, load two backpacks into the backseat, and give up on getting the dog out of the front seat. 

Suffice it to say, gone are our golden, slow-mo mornings when we luxuriated in breakfasts of homemade waffles and freshly whipped cream.  We're off to the races, these days.  But as my fellow mothers will note, the very first task on my above list is to feed two children a healthy, hearty breakfast.  So the new criteria for breakfast are:  (1)  is it wholesome and healthful?;  (2)  will both my kids eat it?;  (3)  can I get it on the table in under two minutes?  And despite what you may think, pancakes do fit the bill.  Here's how:

(1)  Wholesome?  Healthful?  These pancakes are made with organic whole wheat, flax seed, and pureed sweet potato (or pumpkin). 

(2)  Kid-pleasing?  Aside from the healthy stuff, these pancakes have mini chocolate chips AND get drizzled in pure maple syrup.  For extra credit, make the pancakes in fun shapes.

(3)  Super-fast?  Now, here's the trick.  To get from-scratch pancakes on the table in under two minutes, I make a HUGE batch on the weekend and then freeze them.  Thirty seconds in the microwave (or pop in a toaster oven), and voila.  Instant pancakes. I'm not going to lie to you and claim that they taste just as good out of the freezer.  They don't.  The texture suffers a bit.  But my kids seem perfectly happy with them.

Here is my recipe for Chocolate Chip Pancakes.  Well, Whole Wheat, Flax Seed, Sweet Potato, Chocolate Chip Pancakes.  Depending on how picky your little ones are, you can choose how much of that title to share. 

 
This makes about two dozen pancakes, which is enough for my kids for one week. I don’t actually measure the cinnamon, flax seed, or sweet potatoes when I'm making these, so the amounts below are educated guesses -- and flexible.  Feel free to skip the flax, substitute pumpkin for the sweet potato, if your grocer doesn't carry canned, organic, pureed sweet potatoes.  Or maybe you'd like to add less of the vegetable if you think your kids will be suspicious.  If you want 100% whole wheat flour, be my guest, but let me tell you that I found that version too dense.  And if you don't want to use dairy, switch the butter to oil and substitute club soda for the milk -- it makes them airier, too.


 (Whole Wheat, Flax Seed, Sweet Potato) Chocolate Chip Pancakes

•1 c. flour
•1 c. whole wheat flour
•1/2 c flax seed meal
•2 TBSP sugar
•4 tsp baking powder
•1 tsp salt
•1 tsp cinnamon or pumpkin pie spice
•2 c. milk
•2 eggs
•1 c. pureed sweet potatoes or pumpkin (can get organic purees in cans or can steam and puree your own)
•1/4 c. butter
•handful of mini chocolate chips (about 1/5 of the bag)


1. Whisk all dry ingredients (flour through spice) in a large bowl. Make a large well in the center.

2. Melt the butter in a 2-cup glass measure and allow to cool a bit.  Separate the eggs, adding the yolk to the melted butter and the white to the well in the center of the dry ingredients. Beat the egg yolks into the butter.  Beat the egg whites in the well, then add the other wet ingredients, including the butter mixture. Mix all wet ingredients together, trying not to incorporate any dry ingredients yet.  (This is my lazy way of not diryting another bowl by separately mixing the wet ingredients.  I find it easiest to put in half the milk at first, stir it all up, then stir in the remaining milk.)

3. Mix the wet and dry together, using just a few strokes to moisten the flour. Add the chocolate chips and give it a few more stirs.  It will be a very thick batter.

4. Spray and heat a large frying pan (or griddle) over medium to med-high heat. Don’t use too high a heat – pancakes will burn before cooking through.

5. When the pan is hot, spoon on the batter. I measure out about a 1/4 cup per pancake and, due to the thickness of the batter, I use the back of my spoon to help shape them a bit.  Don’t crowd the pan or they’ll be hard to turn.

6. Turn when the rims are full of broken bubbles and the center is starting to bubble (about 2 mins.). Try to turn only once. The second side won’t take as long.

TO FREEZE:  I have tried a couple different methods.  Undoubtedly, the best was to let them cool on the counter, lay them in a single layer on cookie sheets, freeze solid, then transfer to freezer bags.  They did not stick together at all this way.  But it was so time-consuming that I barely ever do it that way.  Instead, I used to let them cool on the counter, then put them into freezer bags with wax paper between the layers.  This mostly kept them from sticking.  Nowadays, I take the laziest possible approach:  after cooling on the counter, I just pop them right into the freezer bag, on top of each other.  Most of the time, they don't stick together too much -- I can just pop them apart -- but even when they do stick, I just break off two stuck together, then.  By the time my kids see them, all cut up on their plate, they have no idea that the pancakes were less than pretty when they came out of the freezer. 

TO MAKE SHAPES:  Aside from the standard round pancake, you can easily make a "Mickey Mouse" (two small and one bigger circle) and "Snowman" (one small and one bigger circle).  A heart is fairly easy, too.  If you want to get advanced, there are very cool pancake molds out there. My only complaint about the molds is that, no matter how much I spray them, the batter tends to stick in any tight spots.  So my advice would be to look for large shapes -- our heart and flower are much easier than our truck and airplane, e.g.  And my sister gave me a "pancake pen" last Christmas.  It's pretty amazing -- I can do letters, dinosaurs, cars, horses, etc.  One caveat:  if you're planning to freeze, the shaped pancakes break apart much easier than the sturdy round ones.  So I just make enough shapes to feed them for the first breakfast, then make all rounds to freeze. 

Thursday, August 12, 2010

Ratatouille: A Bowl of Summer

Do you ratatouille?

Perhaps you are one of the lucky ones who grew up with this French vegetable stew.  Perhaps it's even your Proustian madeleine, as it was for the restaurant critic in Pixar's "Ratatouille."  Perhaps you have your grandmother's perfected recipe carefully folded and tucked away in your file.

No such luck for me. I only discovered the joy that is ratatouille about a decade ago.  I had a version of it as a side at a restaurant in San Francisco. I didn't order it -- a little bowl of stewed vegetables just arrived, unsolicited, next to my fish. I didn't even know what it was, at that point.  A few bites later, and all I knew was that I had never quite experienced the perfect marriage of summer vegetables until that moment.  That first little taste of ratatouille was so divine that I couldn't stop talking about it, thinking about it, dreaming about it.  I was obsessed with the idea that a quintessentially summer dish could be just as warming and comforting as a winter stew.  And I marveled over how I could taste each vegetable separately -- the zucchini, the eggplant, the tomatoes -- but at the same time, the melange was was an entirely different and heightened experience.  In ratatouille, the sum is truly greater than its parts. 

To get to that transcendental end result, however, you must pay strict attention to the quality of each ingredient.  Ratatouille is a profoundly simple dish:  summer vegetables and some herbs.  Every ingredient must shine, shine, shine.  So if you aren't yet shopping at your local farmer's market, this is the moment to start.  If you start with gorgeous vegetables, your ratatouille will be like eating a bowlful of summer.  Even better:  a summer in Provence. 

I tried a lot of ratatouille recipes over the past few summers, trying to recapture that warm and sunny comfort food.  The recipe that follows is an amalgamation of the versions I enjoyed most.  Last year, I hit on Molly Wizenburg’s version, which calls for roasting the eggplant. That has been the key, for me. My recipe makes a ton, but since it is better the second day (and third!), that’s sort of the point. Also, see “options” at the bottom for a great way to use leftovers as a pizza topping. In fact, I must insist that you reserve some ratatouille to use as a pizza topping.  It's simply incredible.
Enjoy!
M

 
RATATOUILLE
Source:  Adapted from A Homemade Life, Molly Wizenburg, and French Women Don't Get Fat, Mireille  Guilano
Serves:  A lot all at once -- maybe 8-12?  Or 2 people over a 3-4 days
Time:  About an hour and half, although some is unattended

•3 lbs. eggplant, sliced crosswise into 1-inch-thick rounds

•3 lbs. zucchini, halved lengthwise and sliced into ½-inch thick half-moons

•3 lbs. tomatoes (Romas are nice, but any will work), seeded and chopped roughly

•12 cloves garlic, chopped

•2 onions, thinly sliced

•Salt and pepper

•Sprigs of basil, thyme, or parsley – or a combo (I like a combo, as long as there is lots of basil!)
•A few bay leaves

•Olive oil

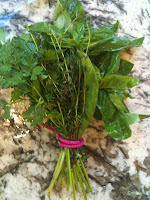
1. Preheat the oven to 400. Prep all the veggies as described above. Make a bouquet garni out of the herbs of your choice and the bay leaves. (Note for novices:  a bouquet garni is a bundle of herbs, tied with twine or in cheesecloth, used to flavor soups and stews.)

2. If your eggplant is very large or seedy, you might want to salt it.  Just lay it out on some paper towels and sprinkle with salt.  Let it sit.  Brush the salt off, press the slices lightly with paper towels, and proceed with the recipe.  This step is optional.

3.  Coat a jelly roll pan with some olive oil. Place the eggplant rounds on the pan, flipping them and rubbing them into the oil to make sure they are coated all over. You might need to use two pans, or bake them in two shifts.  Bake for 30 mins., flipping the slices halfway. They should be soft and lightly browned. Allow them to cool and then chop into 1-inch pieces. (This step can be done a day ahead of time, if needed.)

4. Warm some olive oil over medium heat in a large, deep skillet or heavy pot. Start sautéing the onions. When they are soft and translucent, add the garlic and the bouquet garni. Add the zucchini and cook for about 10 mins, until golden and just tender. Add the tomatoes and cook another 10 mins. or so.

5. Finally, add the eggplant to the pot. Cook another 15-25 mins, until everything is soft and the flavors have melded together. Remove the bouquet garni, pressing out the juices. Season with salt and pepper to taste. Add some more olive oil if it needs to be rounded out. Serve warm or at room temperature, with a lot of bread for sopping up juices. (I also love some Pecorino Romano on top!)  It's delicious right away, but if you're serving this at a party, I'd suggest making it a day in advance, as the medly of flavors really comes together over time.


Options:

1. Many recipes add red bell peppers, but I prefer it without them. Feel free to add some, probably right after the onions.

2. Some serving ideas for the leftovers: with a fried egg on top; over some steamed and smashed new potatoes; drain off the liquid (which is yummy by itself!) and thicken over medium heat, then serve mixed with some cheese, next to a grilled piece of chicken or meat -- I especially love to serve it with sausages.

3. Here’s how to turn the leftovers into a pizza topping:  Drain off the liquid. Beat an egg into the leftover ratatouille. Spread it on pizza dough (either homemade or purchased). Sprinkle on a bunch of Pecorino Romano (or Parmesan, if you prefer). Bake like a regular pizza. This is so delicious that my pizza-obsessive husband recently chose to have seconds of the ratatouille pizza instead of his regular favorite (sausage, mushroom, and onions). 

Tuesday, May 18, 2010

My Granma's Scotch Shortbread

My mother's mother was born in Calder Bank, Scotland and came to the U.S. as a little girl.  Her real name is Anne, but as far as I know, everyone has always called her Nancy.  Of course, I call her Granma.  (And, no, that is not a typo -- she does not put the "d" in grandma.) 

The first thing you need to know about my Granma is that she is tiny.  Exceptionally tiny.  Today, at nearly 92 years old, she is only about 4'9" tall.  My uber-tall, preschool-age daughter finds it endlessly fascinating that she is nearly as tall as her great-grandmother. 

Her small stature and the ever-present twinkle in her eye always made my Granma seem vaguely magical, to me, when I was growing up.  This impression was only enhanced by the fact that she had a Secret-Garden-like backyard (with small gates, brick walls, terraced steps, and lots of ivy), a hidden room in her basement (full of my grandfather's collections), and often spoke in completely serious tones about the mischievous "wee folk"  -- especially one named Jasper.  She is warm and sweet and has always made me feel adored. 

But lest you get the wrong impression, let me also tell you that beneath that soft exterior, my Granma is also smart, tough, precise, and practical.  She does crossword puzzles in pen and her handwriting -- even today -- is as neat as a typewriter.  She was a divorced mother of two girls who also had an intense career as an OR nurse.  She has little patience for those who wallow in self-pity and she does not engage in wistful sentimentality.  At nearly 92, she still drives and lives independently -- and comes from a long line of strong, long-lived Scottish women. 

The other essential thing to know about my Granma is that she has an impeccable sense of style, both in regard to dressing herself and decorating her home.  Yes, she's nearly 92, but I would still seek her opinion before I purchased items for my house, if I lived near her.  She is one of those people who has a remarkable knack for taking a piece of jewelry -- or furniture -- and using it in an unexpected but perfectly delightful way.  I once gave her a rose-shaped brooch made of red tartan fabric, expecting to see it on the lapel of her winter jacket.  She turned up at Christmas wearing it centered at the point of her white v-neck shirt.  It looked marvelous.  And she is the only person I know who had the vision to put a large, folding, black wrought iron gate in the open doorway between her dining and living rooms.  Yet once you've seen how charming that gate is, you wonder why you haven't seen it everywhere.

And my food-memories of my Granma Scott?  She drinks a "cuppa" multiple times a day and used to make me my own cup of weak, milky tea before school in the morning.  She puts butter on just about everything -- even the saltine crackers she would set adrift on my lunchtime bowl of tomato soup.  She used to keep Kit-Kat bars next to her chair, in with her knitting needles and yarn.  And she has always been my baking grandmother. To this day, my very favorite chocolate chip cookies, apple pie, and shortbread are my Granma's versions. 

This is my Granma's recipe for shortbread.  I have a copy of this recipe handwritten by my great-grandmother, Grace Reid, and it differs slightly from the one my Granma gave me;  my great-grandmother used 1/2 cup more flour than my Granma.  But other than that discrepancy, I haven't dared to change anything, not even the slightly outdated title, "Scotch Shortbread."  (I realize that the more modern adjective would be "Scottish," but how dare I alter what my ancestor from Scotland saw fit to call herself?) 

Shortbread could not be simpler to make (three ingredients!), packs well, and keeps for days in an airtight container.  Thus, this is my go-to cookie recipe.  This recipe produces a very buttery, crumbly shortbread.  If you like your shortbread tender, bake it for the least amount of time called for below.  If you prefer a harder, ready-for-dunking-in-tea shortbread, go for the longer bake time.  (I go for the shorter time, but my Granma makes hers very hard.) 

One last note:  my Granma insists on only Land O' Lakes butter.  I've used that brand many times, but have also had great results with other, high-end butters (Plugra, Kerrygold, Horizon Organic).  Just use a good butter with a pronounced, buttery flavor that you enjoy;  do not buy the cheapest butter at the store, or your shortbread's flavor will be lacking.

SCOTCH SHORTBREAD
Source:  Grace Reid & Nancy Scott
Makes:  about 3 1/2 dozen small cookies
Time:  about 10 mins. prep time and 1 hr. unattended baking time

  • 3 sticks butter, at room temperature

  • 3 cups flour

  • 1 c sugar

  1. Preheat the oven to 350.

  2. Using your hands, mix the ingredients together until it works into a ball. (It will be sticky and your hands will be a mess . . . take your rings off first!)

  3. Spread the dough evenly in a 9x13 inch baking dish.  (If you are having trouble with the dough sticking to your hands, you can use a piece of waxed or parchment paper, sprayed with Pam, to help you push it into place.)  Using a fork, deeply prick the shortbread all over the top.  I perforate in nice, evenly spaced, close together rows, to keep it pretty.

  4. Bake at 350 for 15 mins., then  lower the temp to 325 and bake for another 30-45 mins.  The shortbread will be light gold to a deep, toasted wheat color on top, when done (depending on how long you bake it).

  5. Remove the pan from the oven and immediately use a butter knife to cut the shortbread into small squares.  Do it right away; the dough will be too hard to cut later.  Let cool in the pan for a bit, then remove to a wire rack to cool completely.
Long may your lum reek and your kettle boil!*
Enjoy!
M

*A Scottish blessing my Granma used to close letters to me when I was studying abroad in college.  "Lum reek" = "chimney smoke"