Wednesday, October 6, 2010

(Whole Wheat, Flax Seed, Sweet Potato) Chocolate Chip Pancakes

So, we officially have a kindergartner in my house.  We are now part of that world of busy, rushed mornings in which you have about 28 minutes to feed two children a healthy, hearty breakfast; dress one child while reminding the other to dress herself; put finishing touches on two lunchboxes and zip them into two backpacks; beg two children to put on the shoes you have so thoughtfully laid out for them; brush and style one child's hair while she whines;  thank heaven that child #2 is a boy who's hair requires zero attention; hand out two toothpasted toothbrushes and hope that they manage to brush at least 50% of their teeth; help zipper and button two jackets; and, finally, buckle two children into carseats, load two backpacks into the backseat, and give up on getting the dog out of the front seat. 

Suffice it to say, gone are our golden, slow-mo mornings when we luxuriated in breakfasts of homemade waffles and freshly whipped cream.  We're off to the races, these days.  But as my fellow mothers will note, the very first task on my above list is to feed two children a healthy, hearty breakfast.  So the new criteria for breakfast are:  (1)  is it wholesome and healthful?;  (2)  will both my kids eat it?;  (3)  can I get it on the table in under two minutes?  And despite what you may think, pancakes do fit the bill.  Here's how:

(1)  Wholesome?  Healthful?  These pancakes are made with organic whole wheat, flax seed, and pureed sweet potato (or pumpkin). 

(2)  Kid-pleasing?  Aside from the healthy stuff, these pancakes have mini chocolate chips AND get drizzled in pure maple syrup.  For extra credit, make the pancakes in fun shapes.

(3)  Super-fast?  Now, here's the trick.  To get from-scratch pancakes on the table in under two minutes, I make a HUGE batch on the weekend and then freeze them.  Thirty seconds in the microwave (or pop in a toaster oven), and voila.  Instant pancakes. I'm not going to lie to you and claim that they taste just as good out of the freezer.  They don't.  The texture suffers a bit.  But my kids seem perfectly happy with them.

Here is my recipe for Chocolate Chip Pancakes.  Well, Whole Wheat, Flax Seed, Sweet Potato, Chocolate Chip Pancakes.  Depending on how picky your little ones are, you can choose how much of that title to share. 

 
This makes about two dozen pancakes, which is enough for my kids for one week. I don’t actually measure the cinnamon, flax seed, or sweet potatoes when I'm making these, so the amounts below are educated guesses -- and flexible.  Feel free to skip the flax, substitute pumpkin for the sweet potato, if your grocer doesn't carry canned, organic, pureed sweet potatoes.  Or maybe you'd like to add less of the vegetable if you think your kids will be suspicious.  If you want 100% whole wheat flour, be my guest, but let me tell you that I found that version too dense.  And if you don't want to use dairy, switch the butter to oil and substitute club soda for the milk -- it makes them airier, too.


 (Whole Wheat, Flax Seed, Sweet Potato) Chocolate Chip Pancakes

•1 c. flour
•1 c. whole wheat flour
•1/2 c flax seed meal
•2 TBSP sugar
•4 tsp baking powder
•1 tsp salt
•1 tsp cinnamon or pumpkin pie spice
•2 c. milk
•2 eggs
•1 c. pureed sweet potatoes or pumpkin (can get organic purees in cans or can steam and puree your own)
•1/4 c. butter
•handful of mini chocolate chips (about 1/5 of the bag)


1. Whisk all dry ingredients (flour through spice) in a large bowl. Make a large well in the center.

2. Melt the butter in a 2-cup glass measure and allow to cool a bit.  Separate the eggs, adding the yolk to the melted butter and the white to the well in the center of the dry ingredients. Beat the egg yolks into the butter.  Beat the egg whites in the well, then add the other wet ingredients, including the butter mixture. Mix all wet ingredients together, trying not to incorporate any dry ingredients yet.  (This is my lazy way of not diryting another bowl by separately mixing the wet ingredients.  I find it easiest to put in half the milk at first, stir it all up, then stir in the remaining milk.)

3. Mix the wet and dry together, using just a few strokes to moisten the flour. Add the chocolate chips and give it a few more stirs.  It will be a very thick batter.

4. Spray and heat a large frying pan (or griddle) over medium to med-high heat. Don’t use too high a heat – pancakes will burn before cooking through.

5. When the pan is hot, spoon on the batter. I measure out about a 1/4 cup per pancake and, due to the thickness of the batter, I use the back of my spoon to help shape them a bit.  Don’t crowd the pan or they’ll be hard to turn.

6. Turn when the rims are full of broken bubbles and the center is starting to bubble (about 2 mins.). Try to turn only once. The second side won’t take as long.

TO FREEZE:  I have tried a couple different methods.  Undoubtedly, the best was to let them cool on the counter, lay them in a single layer on cookie sheets, freeze solid, then transfer to freezer bags.  They did not stick together at all this way.  But it was so time-consuming that I barely ever do it that way.  Instead, I used to let them cool on the counter, then put them into freezer bags with wax paper between the layers.  This mostly kept them from sticking.  Nowadays, I take the laziest possible approach:  after cooling on the counter, I just pop them right into the freezer bag, on top of each other.  Most of the time, they don't stick together too much -- I can just pop them apart -- but even when they do stick, I just break off two stuck together, then.  By the time my kids see them, all cut up on their plate, they have no idea that the pancakes were less than pretty when they came out of the freezer. 

TO MAKE SHAPES:  Aside from the standard round pancake, you can easily make a "Mickey Mouse" (two small and one bigger circle) and "Snowman" (one small and one bigger circle).  A heart is fairly easy, too.  If you want to get advanced, there are very cool pancake molds out there. My only complaint about the molds is that, no matter how much I spray them, the batter tends to stick in any tight spots.  So my advice would be to look for large shapes -- our heart and flower are much easier than our truck and airplane, e.g.  And my sister gave me a "pancake pen" last Christmas.  It's pretty amazing -- I can do letters, dinosaurs, cars, horses, etc.  One caveat:  if you're planning to freeze, the shaped pancakes break apart much easier than the sturdy round ones.  So I just make enough shapes to feed them for the first breakfast, then make all rounds to freeze. 

Thursday, August 12, 2010

Ratatouille: A Bowl of Summer

Do you ratatouille?

Perhaps you are one of the lucky ones who grew up with this French vegetable stew.  Perhaps it's even your Proustian madeleine, as it was for the restaurant critic in Pixar's "Ratatouille."  Perhaps you have your grandmother's perfected recipe carefully folded and tucked away in your file.

No such luck for me. I only discovered the joy that is ratatouille about a decade ago.  I had a version of it as a side at a restaurant in San Francisco. I didn't order it -- a little bowl of stewed vegetables just arrived, unsolicited, next to my fish. I didn't even know what it was, at that point.  A few bites later, and all I knew was that I had never quite experienced the perfect marriage of summer vegetables until that moment.  That first little taste of ratatouille was so divine that I couldn't stop talking about it, thinking about it, dreaming about it.  I was obsessed with the idea that a quintessentially summer dish could be just as warming and comforting as a winter stew.  And I marveled over how I could taste each vegetable separately -- the zucchini, the eggplant, the tomatoes -- but at the same time, the melange was was an entirely different and heightened experience.  In ratatouille, the sum is truly greater than its parts. 

To get to that transcendental end result, however, you must pay strict attention to the quality of each ingredient.  Ratatouille is a profoundly simple dish:  summer vegetables and some herbs.  Every ingredient must shine, shine, shine.  So if you aren't yet shopping at your local farmer's market, this is the moment to start.  If you start with gorgeous vegetables, your ratatouille will be like eating a bowlful of summer.  Even better:  a summer in Provence. 

I tried a lot of ratatouille recipes over the past few summers, trying to recapture that warm and sunny comfort food.  The recipe that follows is an amalgamation of the versions I enjoyed most.  Last year, I hit on Molly Wizenburg’s version, which calls for roasting the eggplant. That has been the key, for me. My recipe makes a ton, but since it is better the second day (and third!), that’s sort of the point. Also, see “options” at the bottom for a great way to use leftovers as a pizza topping. In fact, I must insist that you reserve some ratatouille to use as a pizza topping.  It's simply incredible.
Enjoy!
M

 
RATATOUILLE
Source:  Adapted from A Homemade Life, Molly Wizenburg, and French Women Don't Get Fat, Mireille  Guilano
Serves:  A lot all at once -- maybe 8-12?  Or 2 people over a 3-4 days
Time:  About an hour and half, although some is unattended

•3 lbs. eggplant, sliced crosswise into 1-inch-thick rounds

•3 lbs. zucchini, halved lengthwise and sliced into ½-inch thick half-moons

•3 lbs. tomatoes (Romas are nice, but any will work), seeded and chopped roughly

•12 cloves garlic, chopped

•2 onions, thinly sliced

•Salt and pepper

•Sprigs of basil, thyme, or parsley – or a combo (I like a combo, as long as there is lots of basil!)
•A few bay leaves

•Olive oil

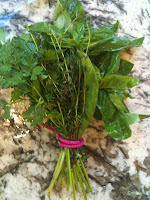
1. Preheat the oven to 400. Prep all the veggies as described above. Make a bouquet garni out of the herbs of your choice and the bay leaves. (Note for novices:  a bouquet garni is a bundle of herbs, tied with twine or in cheesecloth, used to flavor soups and stews.)

2. If your eggplant is very large or seedy, you might want to salt it.  Just lay it out on some paper towels and sprinkle with salt.  Let it sit.  Brush the salt off, press the slices lightly with paper towels, and proceed with the recipe.  This step is optional.

3.  Coat a jelly roll pan with some olive oil. Place the eggplant rounds on the pan, flipping them and rubbing them into the oil to make sure they are coated all over. You might need to use two pans, or bake them in two shifts.  Bake for 30 mins., flipping the slices halfway. They should be soft and lightly browned. Allow them to cool and then chop into 1-inch pieces. (This step can be done a day ahead of time, if needed.)

4. Warm some olive oil over medium heat in a large, deep skillet or heavy pot. Start sautéing the onions. When they are soft and translucent, add the garlic and the bouquet garni. Add the zucchini and cook for about 10 mins, until golden and just tender. Add the tomatoes and cook another 10 mins. or so.

5. Finally, add the eggplant to the pot. Cook another 15-25 mins, until everything is soft and the flavors have melded together. Remove the bouquet garni, pressing out the juices. Season with salt and pepper to taste. Add some more olive oil if it needs to be rounded out. Serve warm or at room temperature, with a lot of bread for sopping up juices. (I also love some Pecorino Romano on top!)  It's delicious right away, but if you're serving this at a party, I'd suggest making it a day in advance, as the medly of flavors really comes together over time.


Options:

1. Many recipes add red bell peppers, but I prefer it without them. Feel free to add some, probably right after the onions.

2. Some serving ideas for the leftovers: with a fried egg on top; over some steamed and smashed new potatoes; drain off the liquid (which is yummy by itself!) and thicken over medium heat, then serve mixed with some cheese, next to a grilled piece of chicken or meat -- I especially love to serve it with sausages.

3. Here’s how to turn the leftovers into a pizza topping:  Drain off the liquid. Beat an egg into the leftover ratatouille. Spread it on pizza dough (either homemade or purchased). Sprinkle on a bunch of Pecorino Romano (or Parmesan, if you prefer). Bake like a regular pizza. This is so delicious that my pizza-obsessive husband recently chose to have seconds of the ratatouille pizza instead of his regular favorite (sausage, mushroom, and onions). 

Tuesday, May 18, 2010

My Granma's Scotch Shortbread

My mother's mother was born in Calder Bank, Scotland and came to the U.S. as a little girl.  Her real name is Anne, but as far as I know, everyone has always called her Nancy.  Of course, I call her Granma.  (And, no, that is not a typo -- she does not put the "d" in grandma.) 

The first thing you need to know about my Granma is that she is tiny.  Exceptionally tiny.  Today, at nearly 92 years old, she is only about 4'9" tall.  My uber-tall, preschool-age daughter finds it endlessly fascinating that she is nearly as tall as her great-grandmother. 

Her small stature and the ever-present twinkle in her eye always made my Granma seem vaguely magical, to me, when I was growing up.  This impression was only enhanced by the fact that she had a Secret-Garden-like backyard (with small gates, brick walls, terraced steps, and lots of ivy), a hidden room in her basement (full of my grandfather's collections), and often spoke in completely serious tones about the mischievous "wee folk"  -- especially one named Jasper.  She is warm and sweet and has always made me feel adored. 

But lest you get the wrong impression, let me also tell you that beneath that soft exterior, my Granma is also smart, tough, precise, and practical.  She does crossword puzzles in pen and her handwriting -- even today -- is as neat as a typewriter.  She was a divorced mother of two girls who also had an intense career as an OR nurse.  She has little patience for those who wallow in self-pity and she does not engage in wistful sentimentality.  At nearly 92, she still drives and lives independently -- and comes from a long line of strong, long-lived Scottish women. 

The other essential thing to know about my Granma is that she has an impeccable sense of style, both in regard to dressing herself and decorating her home.  Yes, she's nearly 92, but I would still seek her opinion before I purchased items for my house, if I lived near her.  She is one of those people who has a remarkable knack for taking a piece of jewelry -- or furniture -- and using it in an unexpected but perfectly delightful way.  I once gave her a rose-shaped brooch made of red tartan fabric, expecting to see it on the lapel of her winter jacket.  She turned up at Christmas wearing it centered at the point of her white v-neck shirt.  It looked marvelous.  And she is the only person I know who had the vision to put a large, folding, black wrought iron gate in the open doorway between her dining and living rooms.  Yet once you've seen how charming that gate is, you wonder why you haven't seen it everywhere.

And my food-memories of my Granma Scott?  She drinks a "cuppa" multiple times a day and used to make me my own cup of weak, milky tea before school in the morning.  She puts butter on just about everything -- even the saltine crackers she would set adrift on my lunchtime bowl of tomato soup.  She used to keep Kit-Kat bars next to her chair, in with her knitting needles and yarn.  And she has always been my baking grandmother. To this day, my very favorite chocolate chip cookies, apple pie, and shortbread are my Granma's versions. 

This is my Granma's recipe for shortbread.  I have a copy of this recipe handwritten by my great-grandmother, Grace Reid, and it differs slightly from the one my Granma gave me;  my great-grandmother used 1/2 cup more flour than my Granma.  But other than that discrepancy, I haven't dared to change anything, not even the slightly outdated title, "Scotch Shortbread."  (I realize that the more modern adjective would be "Scottish," but how dare I alter what my ancestor from Scotland saw fit to call herself?) 

Shortbread could not be simpler to make (three ingredients!), packs well, and keeps for days in an airtight container.  Thus, this is my go-to cookie recipe.  This recipe produces a very buttery, crumbly shortbread.  If you like your shortbread tender, bake it for the least amount of time called for below.  If you prefer a harder, ready-for-dunking-in-tea shortbread, go for the longer bake time.  (I go for the shorter time, but my Granma makes hers very hard.) 

One last note:  my Granma insists on only Land O' Lakes butter.  I've used that brand many times, but have also had great results with other, high-end butters (Plugra, Kerrygold, Horizon Organic).  Just use a good butter with a pronounced, buttery flavor that you enjoy;  do not buy the cheapest butter at the store, or your shortbread's flavor will be lacking.

SCOTCH SHORTBREAD
Source:  Grace Reid & Nancy Scott
Makes:  about 3 1/2 dozen small cookies
Time:  about 10 mins. prep time and 1 hr. unattended baking time

  • 3 sticks butter, at room temperature

  • 3 cups flour

  • 1 c sugar

  1. Preheat the oven to 350.

  2. Using your hands, mix the ingredients together until it works into a ball. (It will be sticky and your hands will be a mess . . . take your rings off first!)

  3. Spread the dough evenly in a 9x13 inch baking dish.  (If you are having trouble with the dough sticking to your hands, you can use a piece of waxed or parchment paper, sprayed with Pam, to help you push it into place.)  Using a fork, deeply prick the shortbread all over the top.  I perforate in nice, evenly spaced, close together rows, to keep it pretty.

  4. Bake at 350 for 15 mins., then  lower the temp to 325 and bake for another 30-45 mins.  The shortbread will be light gold to a deep, toasted wheat color on top, when done (depending on how long you bake it).

  5. Remove the pan from the oven and immediately use a butter knife to cut the shortbread into small squares.  Do it right away; the dough will be too hard to cut later.  Let cool in the pan for a bit, then remove to a wire rack to cool completely.
Long may your lum reek and your kettle boil!*
Enjoy!
M

*A Scottish blessing my Granma used to close letters to me when I was studying abroad in college.  "Lum reek" = "chimney smoke"

Friday, April 9, 2010

The One-Pot Meal: Jambalaya

Oy.  I have been derelict in my blogger-duties.  I completely neglected to post Part Three of the "Learn to Cook" series last month. Mea culpa.  The good news is that Parts Three and Four are related and so I promise to bring them to you one after the other, starting now. 

In Part Three of our "Learn to Cook" series, we are going to take a step beyond the pasta toss and try to do a little more actual cooking.  But we'll still keep it simple by sticking to just one pot.  Cooking is much less intimidating if you only have one pot on the stove to monitor.  No need to worry that your sauce will burn while you were concentrating on sauteing the meat or tending to the veggies roasting in the oven.  For beginners (or for experienced cooks who happen to have distractions, like, say, a three year old who is using your legs as a tunnel for his cars), knowing that you just have one pot on the stove, happily bubbling away, can be comforting and confidence-building.

For this month's recipe, I've chosen to give you my 30-minute version of jambalaya.  I've made "real" jambalaya before, and it was completely and utterly wonderful.  But it also required a lot of time on the stove.  Then, about a decade ago, I discovered a recipe for 20-minute jambalaya in Desperation Dinners, by Beverly Mills and Alicia Ross.  It still had all the great, Louisiana flavors -- spicy sausage flavoring those good old staples, rice and beans -- but was on the table in 20 mins.  Over the years, I have altered the recipe a bit (mainly using Emeril Lagasse's jambalaya recipe from Potluck), in favor of starting with a "Cajun mirepoix" and fresh thyme.* It is still ready in about 30 minutes and the hardest part is chopping the veggies -- and how hard is that?

One note for the beginners out there:  Don't be intimidated by the long-ish list of ingredients.  You mostly just dump them into a pot and let them sit.  And don't be intimidated the list of spices/herbs, either.  All of these (bay leaves and oregano, especially) are worth having in your pantry, as they provide the flavor backbone of many, many meals.  And if you don't want to buy something, just leave it out.  The only things I wouldn't dream of leaving out are the rice, beans, sausage, and thyme. 


JAMBALAYA
Source:  adapted from Desperation Dinners, Beverly Mills & Alicia Ross;  Potluck, Emeril Lagasse
Serves:  6
Time:  30 mins.
  • 1 tsp butter
  • 1 large onion
  • 1 large bell pepper
  • 2-3 stalks celery
  • 2-3 cloves garlic
  • 8 oz.-1 lb. kielbasa or andouille sausage
  • 1 3/4 c rice
  • 1 can chicken broth
  • 1/4 c white wine (or more water)
  • 3 bay leaves
  • 4 sprigs fresh thyme
  • 1/2 tsp onion powder
  • 1/2 tsp. dried oregano
  • 1/2 tsp. black pepper
  • 1 can white beans
  • 1 can black beans
  • 1 can stewed tomatoes
  • Optional ingredients:  hot sauce to taste, green onions for garnish, cubed ham, cooked shrimp, chicken
  1. Chop the onion, green pepper, and celery.  You should have about 1 c. of each, but there is no need to measure -- just eyeball it.  Melt the butter in a large pot or skillet that has a lid.  Add the veggies and cook until they begin to soften -- about 2 mins.  Add the garlic and cook for another 2 mins., stirring often. 
  2. Cut the sausage into 1/4-inch thick slices and add to the pot, cooking for another 2 mins. or so. 
  3. Add the rice and stir to blend, cooking for another minute or two.  Add the chicken broth and wine, stirring to moisten all the rice.  Add the thyme and bay leaves.  Cover the pan and cook until the rice is getting tender (5-15 mins., depending on what type of rice you used). 
  4. Meanwhile, combine the onion powder, oregano, and black pepper in a little cup.  Rinse and drain the beans. 
  5. Add the spice mixture, beans, and tomatoes to the pot.  Cover again and let cook until the rice has absorbed most of the liquid and the flavors have blended -- about 10 mins.  Taste and adjust seasonings. Serve.
  6. Note on optional ingredients:  Jambalaya comes in as many forms as there are cooks in Louisiana kitchens.  So if you simply have to have chicken, or ham, or shrimp in your jambalaya -- add it!  If you are starting with raw chicken, I'd add it (cut into bite-sized pieces) to the pot first, brown it in some oil or butter, then remove it from the skillet and proceed with the recipe.  (Add it back in with the beans.)  If you are adding ham, I'd add that with the sausage.  Cooked shrimp?  With the beans.  And in our house, we don't add any hot sauce to the pot, because this is one of our kids' favorite meals, but they can't take the spice.  But Matt and I pass the bottle of hot sauce back and forth at the table, like a ping-pong match. 
I recommend serving this with a simple green salad or, for those ready for more than one kitchen task at a time, roasted carrots or cauliflower.  Add a crusty loaf of French bread and wine, naturally.  And if you've got kids who might be adverse to trying something new, may I suggest having a "dinner-and-a-movie" night and serve this while watching the just-released The Princess And The Frog?  If that movie doesn't have you craving Creole cooking, I don't know what will.  It's got me wanting to make gumbo and etouffee next! (And lucky for me, my husband's old college roommate is from N.O. and just shared his shrimp etouffee recipe with me!  I'll keep you posted . . .)

Enjoy!
M

Other one-pot recipes on this blog: Super Bowl Chili and Quickie Shepard's Pie (only uses one pot if you have an oven-proof skillet and don't have to transfer to a casserole dish). 
*In case inquiring minds want to know: What is a mirepoix?  A mirepoix is a combination of three "aromatics" -- vegetables -- sauteed to create a base of flavor on which to build a dish.  In fact, the repeated use of a specific mirepoix in a given culture is what lends a consistent, common, underlying taste to all of the traditional dishes of that culture. Traditionally, in French cuisine, a mirepoix is made up of onions, celery, and carrots -- usually sauteed in butter.  In Cajun/Creole cuisine, green peppers take the place of the carrots in the trinity of vegetables. 

Friday, March 12, 2010

Kale-ing Me Softly: Roasted Kale and Kale Smoothies

I have a confession to make. [Big breath.]

I have not, historically, enjoyed my leafy greens. 

I know, I know!  It's embarrassing!  They are so incredibly nourishing, so healthful - how could I turn up my nose at such a nutritionally perfect food?  And so many foodies gush over their favorite steamed/sauteed/squirted with lemon/tossed with bacon/stewed with garlic versions.  But I just simply did not enjoy them.  I found them unpleasantly bitter and chewy, the flavor too assertive.  

But, oh, how I wanted to love them!  They were all so lovely, beckoning at the farmer's market.  The chard with its stems in a brilliant rainbow of jewel-tone colors, the kale with its frilly, curly leaves.  I wanted to be the one at the market with those gorgeous greens lounging across the top of my basket.  Yet I always walked on by, and anytime I saw a new recipe involving a leafy green, I sighed and turned the page.  It wasn't meant to be.

Until now! 

I have seen the light!  In the past month, I have been eating kale like it's going out of style, thanks to two of my dearest girlfriends/cooks, Heather and Sarah.  (And with a little help from the amazing kale from Be Wise Ranch, here in San Diego.)  So here are the two recipes that have turned me from kale-phobic into kale-fanatic.  Now that I'm head over heels for these two versions of kale, I'm ready to venture forth and try some of those kale (and chard, beet greens, mustard greens, collard greens, etc.) recipes I've been ignoring.  I'll let you know how it goes . . .

HK'S ROASTED KALE
Heather is one of my college girlfriends and although we don't get to see each other very often, I get the joy of "hearing" her voice when I read her blog, Stumptown Sisters.  And despite me never mentioning my love for Orangette to Heather, she gave me Molly Wizenberg's book, based on that blog, as a gift.  So, obviously, I trust that Heather's cooking style and tastes will dovetail with mine.  When I did my recent post about roasted cabbage, Heather left a comment suggesting I try roasting kale.  Well, given my intense love of all roasted veggies, I knew that this was my big chance to finally fall in love with a leafy green.  And, wow!  This is so good.  It makes an excellent snack -- Heather says it's as good as popcorn, but to my mind, it's more like eating potato chips.  I've eaten an entire bunch of kale while my kids were snacking on buttered popcorn and I never even once had the desire to dip into their popcorn bowls.  It really is that good.  (And if you aren't convinced yet, let me tell you that my mom, who, God love her, is not exactly a health food or veggie lover, thought this was delicious!)
  • 1 bunch kale (I've used both green and purple curly-leaf kale, but I'm sure any of the varieties of kale would work fine)
  • olive oil
  • sea salt and freshly ground pepper
  1. Wash and dry your kale leaves.  Pull the tender leaves off of the tough stems and put them on a rimmed baking tray.
  2. Drizzle the leaves with some olive oil.  You want enough to just coat them, so that they are all glistening, but not so much that they are drowning in a pool of oil.  Generously salt and pepper the leaves.
  3. Roast at 400 (or 425 or 450 -- it doesn't much matter what temp), tossing them around every now and again, until the leaves are starting to get crispy.  I like mine fairly close to being burnt -- darker than depicted in the photos below.  The leaves get papery and crispy and as addictive as potato chips.  I also like mine with a pretty hefty dose of pepper, but use your own taste as a guide, here.  I serve them piled high on a platter.  And I'm not ashamed to say that I just use my fingers, if I'm snacking. 

Note:  I think that this has the potential to be a kid-pleasing veggie preparation, with one caveat:  go easy on the pepper!  I called it "leaf chips" and got my 5 yr. old to take a bite (always the biggest hurdle with a new veg), but she spit it out, saying it was too spicy -- and now she won't try it again.  I wish I had given it to her with just a lot of salt, and then added pepper to the portion on my plate. 


SARAH'S SUPER SMOOTHIE
My next great kale adventure came in the very surprising form of a smoothie.  My friend Sarah has been touting the deliciousness and health benefits of her "green smoothies" ever since I met her two years ago.  And I've even seen her kids drink them down.  But a smoothie made with kaleSeriously?  It just never sounded appealing to me.  And then my son got a nasty cold just 5 days before his third birthday party and I wanted to try anything and everything I could to boost his immune system and get him healthy in time to enjoy his birthday.  Well, I wasn't lucky enough to get him to fall in love with the smoothie -- he refused to try it because it was green (which makes zero sense, since he adores guacamole and eats salad).  But I fell in love, instead.  Here is the basic recipe.
  • 2-5 leaves kale (start with 2 and work your way up from there)
  • a handful of parsley (Sarah says about 1/4 of a bunch;  I just cut a handful from my garden)
  • 1 apple
  • 1 orange
  • 1 banana
  1. Wash all your produce.  Pull the tender kale leaves off of the tough stems and put them in the blender.  Pluck the leaves of parsley (and some small stems are fine, too) and add them to the blender.  Add a splash of water and blend the greens. 
  2. Core and chop the apple; peel and chop the orange;  peel and chop the banana.  Add all three to the blender and mix.  This makes a very thick smoothie, but you can thin it with water to your desired consistency.  I thin it just a bit and serve with a spoon.  This makes enough for at least two servings, although I often eat the entire thing over the course of a morning (or afternoon, if I'm having it for lunch). 

Note:  As I said, Sarah's kids drink this, so if your kids can get past the green color, this could be a great way to get in a bit of veggies.  You could start with just one kale leaf and all their favorite fruits, even.  Also, you can play with the recipe quite a bit.  Sarah has added mangoes, berries, and other fruits that she has on hand.  I have tried it without each of the three fruits listed above and, although I like the combo of all three best, I think the only essential one is the apple.  It just wasn't quite as tasty without the apple. 

Enjoy!
M

PS  Lyn, that title pun was for you! ;-)

Monday, February 15, 2010

Learn To Cook, Pt. 2: The Pasta Toss

Time for another installment of our monthly "Learn to Cook" series.  Last month, we talked about simple, "assembly only" dinners -- both sandwiches and salads.  This month, we're going to take another baby step forward and try pasta tosses.  Everyone can make a big bowl of pasta with jarred marinara sauce, right?  And that is certainly comforting and can be delicious.  But if a jar of marinara is the only treatment you ever give your pasta, then you are missing out on a world of possibilities.  You can break the red sauce rut by tossing your noodles with a variety of pantry/fridge staples.  Jarred roasted red bell peppers, pine nuts, capers, tuna, spinach, feta cheese, artichoke hearts, kalamata olives . . . There are lots of items living in your kitchen right now that are divine tossed in a bowl with some pasta. 

When you move beyond the basic pasta-and-marinara combo, you'll get two rewards.  First, you won't be bored.  Having just one taste experience for dinner -- let alone having that same dinner many times a month -- is boring, boring, boring.  But if you your noodles are tossed with other ingredients, then you get one bite of pasta followed by a bite of, say, feta cheese, then a bite of kalamata olives, then artichoke hearts . . . you get the picture.  Lots of tastes in one plate, which is much more exciting and satisfying.  So you'll have more variety in any given meal -- but you'll also have more variety over time, as you can change up your ingredients and achieve completely new pasta dishes every time.

The second reward is that you are very likely to eat less.  Most people, when they have just one taste experience (big bowl of red sauce) for dinner, tend to go for volume in order to achieve satisfaction.  (How many times have you reached for another slice of pizza even though you were already rather full, because you just didn't feel satisfied yet?)  But if you have lots of flavors in a meal, you can actually eat less but walk away from the table feeling much more satisfied.  After a dinner of pasta-with-marinara, many people end up feeling stuffed.  After a pasta toss with lots of flavors, you are more likely to feel full and satiated -- but not unpleasantly stuffed. 

I'll give you one complete pasta toss recipe and then a few different ideas for combinations that my family enjoys.  Let me know how your experiments go!  One last note:  I often like to serve pasta tosses as meatless meals, but if your family eats meat every night, you could always add bits of leftover chicken, turkey, sausage or whatever you've got. 

Angel Hair with Herbed Goat Cheese and Tomatoes
Source: adapted from Cooking Light magazine
Time:  about 15 mins. (after water boils)
  • 1 package fresh angel hair pasta (from refrigerated section)
  • 1 pint cherry tomatoes (mix of heirloom types is nice)
  • 3 oz. herb-flavored goat cheese
  • 1 TBSP olive oil + more for drizzling
  • 1-2 cloves garlic (or 1-2 tsp bottled, minced garlic)
  • salt and pepper
  • fresh basil
  • about 3/4 c chicken broth
  1. Bring some water to a boil and then cook your angel hair according to package directions.
  2. Meanwhile, cut the tomatoes in half, lengthwise.  Mince the garlic. Cut the goat cheese into chunks. Cut the basil leaves into thin strips.
  3. Heat the oil in a large, nonstick skillet over medium heat.  Add garlic and saute for about 30 seconds.  Add the tomatoes and cook, stirring frequently, until the tomatoes start to soften up a bit (about 2 mins.)  Add the chicken broth and cook another minute or so. 
  4. Meanwhile, when the pasta is done, drain it and either return it to the pot or put it in a large serving bowl.  Add the goat cheese, basil, a little salt, and a lot of pepper on top and then gently toss it together just a bit.  Then add the tomato mixture and toss more thoroughly.  I like to drizzle individual servings with some extra olive oil and basil, then.  Taste and add more salt, pepper, oil, or chicken broth, if needed.
Other Pasta Toss Ideas:

Italian Peppers and Sausage:  Saute some Italian sausage (either links -- whole or cut up -- or bulk sausage, hot or mild) in some oilive oil.  Meanwhile, slice an onion and some bell peppers.  Add the veggies to the pan.  Toss with penne and some more olive oil -- and maybe a splash of balsamic or red wine vinegar.  (You could also add a can of diced tomatoes, but then let it cook all together a bit -- about 10 mins.)  Salt, pepper, and cheeses (mozzarella, provolone, parmesan, romano) as you please.  I've also used this general idea to use up leftover pasta-with-marinara sauce.  For that meal, I make the sausage and onion/peppers as described, then mix it with the leftover pasta, cover with mozzarella, and bake until warmed through and the cheese is melted.

Greek Pasta:  Chop some sundried tomatoes (the jarred kind packed in oil) and toss them in a big bowl.  Add some kalamata olives, feta, garlic, parsley, and penne or spaghetti.  Toss with some olive oil and maybe a splash of vinegar.  Other possible add-ins:  onions (cooked for a bit or not), artichoke hearts, capers.  If you want to get fancy, saute some scallops with some chopped onion and garlic in olive oil and a splash of wine.  (Adapted from Desperation Dinners.)

Ricotta Pasta:  Put some ricotta cheese and parmesan or romano in a big bowl.  Add some chopped parsley.  Cook an onion in some olive oil and then add a bit of garlic and some halved cherry tomatoes.  When it's all soft, toss it with penne.  Salt and pepper to taste.  Other add-ins:  bacon, peas, sausage, zucchini, cooked spinach.  Ricotta is also great added to leftover pasta-and-marinara and baked (as discussed above). 

Tortellini With Sausage:  For a change of pace, use a filled pasta -- like tortellini or ravioli -- in a pasta toss.  My favorite is from adapted from Desperation Dinners.  Brown some bulk Italian pasta with a chopped onion.  Add a little garlic.  Chop some jarred, sun-dried tomatoes and them to the skillet, along with a handful of pine nuts.  (If it starts to get dry, add a splash or water.)  Toss with tortellini and serve with lots of romano or parmesan.

Pasta Pomodoro:  This is a classic that never seems to get tired -- but it is only great during the summer, in peak tomato season.  Chop some amazing, perfect tomatoes (I love the way a bunch of different colored heirlooms look and taste)  and add them, with their juice, to a big bowl.  Chop some garlic and add it, too.  Chop some basil and stir it in.  Add a LOT of oil -- start with at least a 1/4 c if you're making the standard 4 servings.  Toss with angel hair.  Taste to see if it needs salt, pepper, or more oil or basil.  Serve with lots of romano or pamesan. 

Tuna Toss:  We call this "Al Fresco" pasta in our house, as it is almost always served outside.  It is adapted from Desperation Dinners.  Again, wait til summer, when the tomatoes make this divine.  Chop up a bunch of tomatoes and add to a bowl with their juice.  Chop a bunch of parsley and add it.  Chop and add a few cloves of garlic.  Add a handful of kalamata olives.  Add a few spoonfuls of capers.  Add some tuna (canned or in the pouch, as you please).  Add a few handfuls of romano or parmesan.  Drizzle with a lot of olive oil.  Toss with fusilli.  Add salt, pepper, and more oil, to taste.

Spinach and Prosciutto Toss:  While you're boiling your noodles, heat some olive oil in a skillet and some minced garlic and a big punch of red pepper flakes.  Take a few ladles of water out of the pasta pot and add it to the skillet.  Put a bag of baby spinach in your colander.  When your spaghetti is done, drain it over the spinach -- this will cook the spinach.  Add the noodles and spinach to the skillet.  Add some sliced prosciutto, the juice of a lemon, salt, and lots of pepper, and romano or parmesan.  (Adapted from Rachel Ray's 2, 4, 6, 8 and Cooking Light magazine.)

Satay Noodles:  Here's a killer one to move your noodles away from Mediterrean flavors. This is (barely) adapted from Rachel Ray's 2, 4, 6, 8.  Saute some fresh ginger, garlic, and a big pinch of red pepper flakes in either canola or peanut oil.  After about 2 mins., take a ladle of the water out of the pasta pot and about a cup of chicken broth.  Add about 1/3 cup of soy sauce (or tamari, if you have it).  Turn the heat to high and let it bubble for a minute or two.  Turn off the heat and add 1/2 cup of smooth, all-natural peanut butter (if you eat the processed, Jiff-type of P.B., that will work).  Whisk to combine.  If it gets too thick, splash a little more of the pasta water in.  Squeeze two limes into the sauce and then toss with the hot noodles.  (Spaghetti or another long, thick noodle works best here.)  This is good just like this, but if you have some roasted peanuts and/or cilantro to put on top, you will be very, very happy. 

Friday, January 29, 2010

Roasted Cabbage: Mon Petit Chou

Can I tell you a little secret?  I love cabbage.  I know, I know.  Poor cabbage has an image problem.  People think cabbage is stinky, bland, boring, cheap.  It's the working-class, hardy, reliable veg that gets overshadowed by its fancy, ritzy neighbors in the produce section.  The leeks, the beets, the fennel, the white asparagus -- they all seem so much more glamorous than the sturdy cabbage. 

But cabbage has so much to offer!  A small, fresh cabbage is surprisingly sweet.  And they keep for days on end in the crisper drawer, which means they are like a little gift near the end of the week, when you've already burned through those frou-frou veggies that couldn't take another day in the fridge.  (Cabbage will wait for you.)  And as long as you don't boil cabbage to death, it is a real pleasure to eat.  And if all that didn't convince you, consider this:  "mon petit chou" is a French term of endearment.  It means "my little cabbage."  And we can all agree that the French know a thing or two about food, love, and life, can we not?  I rest my case.

I love green cabbage braised in cream, red cabbage shredded and tossed in a lemon-pepper dressing, and even a homemade coleslaw with curried mayo, nuts, and dried cranberries.  But all those cabbage preparations have been overshadowed by my new favorite recipe:  Roasted Cabbage with Lemon.  You may already know of my intense love of all roasted veggies.  And yet I had never thought of roasting cabbage until I saw it in the January issue of Martha Stewart Living.  I tried it immediately and we've had it once a week ever since.  I even ate about 3/4s of a small, roasted cabbage as my entire dinner the other night.  (Although, to be fair, that was because the French Vegetable Stew I made to go with the cabbage was completely awful.  So while the French may know a thing or two about food, perhaps I do not.)

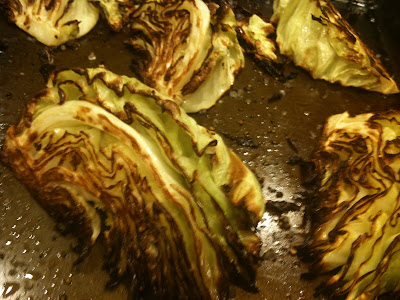
This recipe takes advantage of cabbage's natural sweetness, as some of the sugar carmelizes as it roasts and browns.  Then the lemon squeezed over it complements the sweetness perfectly.  Even better, this recipe is as easy as it comes.  Perfect even for the beginners out there. 

So pick yourself up a petit chou this week and get ready to fall in love.

ROASTED CABBAGE WITH LEMON
Source:  adapted from Martha Stewart Living, Jan. 2010 issue
  • 1 small, green cabbage
  • olive oil
  • salt and pepper
  • 1 lemon
  1. Preheat your oven to 450 degrees.
  2. Remove any loose, dirty or bruised outer leaves from your cabbage.  Trim the stem and then cut the cabbage in half.  Then cut each half into four wedges, trying to preserve a bit of core on each wedge, to help hold them together. 
  3. Arrange wedges on a rimmed baking sheet.  Brush the wedges generously with olive oil on all sides.  (Martha called for just 1/2 tsp. of oil, but I easily use a full tablespoon or so.  Also, if you don't have a brush, just lightly pat them with oil -- I even let my 2 yr. old do that recently and they turned out fine.)  Sprinkle generously with coarse salt and freshly ground pepper.
  4. Roast for about 10-15 mins. and then carefully flip.  Roast for another 10-15 mins.  (I like mine to get some good color, so I go pretty long.  But do check every now and again!)
  5. Squeeze the lemon over the cabbage and serve. 
Enjoy!
M

Sunday, January 24, 2010

Super Bowl Chili: To Soup or Not to Soup


In general, I avoid recipes that rely on canned soups. I try to adhere to the Michael Pollan rule of only eating "real food," not "edible foodlike substances."  And canned soups fall squarely into the "foodlike substances" category.  They have lots of salt, high fructose corn syrup, and other unpronounceable ingredients that I don't like eating or serving. Oh, I have one or two old, food-splattered recipes in my collection that call for canned soups, and I do cherish those recipes because of the history associated with them. But they are definitely the exception, not the rule.

I bring this up because my husband has a favorite canned-soup meal from childhood: his mom's Super Bowl Chili. It relies on canned tomato soup to give the chili body. I've made the chili many times, from my mother-in-law's recipe. And it rocks. Lots of chili flavor, but still mild enough for my kids to love. With a few tweaks (I altered the beef-to-bean ratio in favor of beans, e.g.), it quickly became our house chili. This is the stuff football gamewatches are made of.

But still, I hated cranking open those cans of processed soup and feeding it to my kids. So when winter weather finally hit San Diego last month, I decided to make Super Bowl Chili -- but with organic, canned tomato sauce standing in for the soups.  Guess what?  Still awesome.  And now served without the side of guilt.  I'll leave it to you to decide which route to go: to soup or not to soup.  But you know where I stand.

By the way . . . I just hosted a potluck party for a large group of friends.  I made this Super Bowl Chili and a batch of "Kicked-Up Chili" from Emeril Lagasse's Potluck cookbook.  I had been itching to try Emeril's chili for a while, as it included a long list of fun ingredients such as two bottles of dark beer, cinnamon, and a square of unsweetened chocolate.  I was envisioning a chili with mole-like flavors.  Guess what?  It was fine.  Certainly nothing wrong with it.  But just . . . meh.  And the good, old, ultra-easy Super Bowl Chili?  Rave reviews, as always.  This is definitely a case where simpler was more satisfying. 

SUPER BOWL CHILI

Serves:  8-10
Time:  10 mins. prep., 1 hour mostly unattended cooking time

  • 2 lb. ground beef
  • 1 medium onion, chopped
  • 3 TBSP chili powder
  • 2 x 15 oz. cans tomato sauce
  • 2 x 4 oz. cans chopped green chiles
  • 1 x 16 oz. jar salsa (mild to hot, your choice)
  • 2 cans kidney beans
  • 2 cans pinto beans
  • Toppings of choice:  chopped onion, cheddar cheese, sour cream, cilantro
  1. Brown the beef with the onion and some of the chili powder.  Drain off some of the fat. 
  2. Stir in the rest of the chili powder.  Add all other ingredients including liquid in cans of beans.  Simmer at least one hour, stirring with some regularity, to make sure chili doesn't start to stick to the bottom and burn. 
Serving notes:  Chili is always awesome with baked potatoes on the side.  And by the way, no, a microwaved potato doesn't really cut it. To get that steakhouse-quality crispy skin, you need to bake it at high heat, directly on the oven rack.  Try 450 degrees for about an hour.

When we don't have Russet potatoes in the house, we serve Super Bowl Chili with tortilla chips, corn bread, French bread, saltines, roasted new potatoes, etc.  Lots of folks like to serve chili on a bed of rice, too.  (And, apparently, if you're from Cincinnati, you like it over spaghetti.)
 
If you've got leftovers, try filling baked potato skins, topping with lots of cheddar, and broiling.  Serve with sour cream for dunking.  Also, chili freezes beautifully.  And, once, my pizza-obsessed, pizza-making husband put together a cornmeal crust and spread the leftover chili on top, smothered in cheddar.  So yum!


Enjoy!
M


Wednesday, January 20, 2010

Assembling Dinner: Salads


So, last week we talked about quick, assembly-only "food on bread" dinners  -- basically, sandwiches and quesadillas.  This week, in the second half of January's installment in our year-long Learn to Cook series, we're going to talk salad days.  I eat a lot of salad, often at lunch.  But I love a "big salad" (a la Elaine) for dinner, especially on warm days or on days when I've had a bigger-than-usual lunch.  But best of all, salad is an assembly-only meal that is light, refreshing, nutritious, and satisfying.  So it's perfect for the new cook.

The difference between a ho-hum salad and a memorable, craving-inducing salad really comes down to the dressing.  So let's establish this straight away:  bottled dressings simply aren't as good as homemade ones.  If you have nice, tender greens and interesting, flavorful mix-ins, don't drown them in a thick, sugary, bottled dressing.  What's the point?  Instead, highlight them with a simple vinaigrette or, my personal favorite, a lemon-oil dressing (see below). 

So, let's build a better salad.

Step #1:  Choose your greens.
I like baby greens for almost every salad.  The only exception is when I want a lot of crunch, to stand up to heavy mix-ins.  Then, I go for romaine. If you have access to super-fresh greens from a farmer's market, that is the way to go.  But those bagged, grocery store mixes are a good runner-up. 

Once you gently wash your greens, spin them dry in a salad spinner.  You don't want water-logged greens, so dry them well.  Put them into a big bowl, so that you'll be able to toss them well.  Then, I like to salt and pepper my greens, rather than putting salt into the dressings. 

Step #2:  Choose your mix-ins.
Unless I'm going for a particular genre (see below!), then I follow a basic formula when assembling a salad:  sweet + savory = one tasty salad.  The classic example here is a spinach salad with pears (sweet), walnuts (savory), and blue cheese (savory).  Another favorite of mine is beets (sweet), walnuts (savory), and crumbled goat cheese (savory).  (If you have a little fresh dill to put on that one, it's divine!) And when the tomato days hit in summer, try a mix of heirloom tomatoes with goat cheese and basil.  So yum.

To add some heft to a dinner salad, add a meat (savory).  Later on this year, when you're really cooking, you'll likely have lots of leftovers to choose from (grilled chicken, roasted turkey, etc.).  But for now, consider buying a roasted chicken from the grocery store.

Other interesting mix-in ideas:

Sweet: 
Apples
Pomegranate seeds (I can buy the seeds by themselves at my farmer's market and at my grocery store)
Beets (I roast them, but, beginners, try canned!)
Citrus sections (clementines, grapefruits, oranges, etc.)
Grapes
Berries
Dried fruit (cranberries, apricots, raisins)
Tomatoes

Savory:
Avocados (great mixed with the grapefuit sections!)
Meats  (leftover chicken, turkey, beef, or pork, or chicken from a grocery-store roasted chicken)
Salmon -- smoked or canned
Tuna
Bacon
Hard-boiled eggs
Onions
Roasted potatoes or other veggies
Blue cheese
Feta cheese
Goat cheese
Fresh mozzarella
Shavings of Pecorino Romano or Parmegiano Reggiano
Nuts (hazelnuts, walnuts, almonds, pine nuts)

One other mix-in idea that I have to mention, but that steps outside of my usual sweet + savory formula, is the mixed-herb salad.  Chop a variety of fresh herbs -- basil, parsley, chives, tarragon, etc. -- and toss them with your greens.  So, so good.

One note: With the exception of the mixed herbs, don't add your mix-ins to your salad until AFTER you dress the greens.

Step #3:  Choose your dressing.
I have three basic dressings that I use for nearly every salad.  As noted above, I salt my greens directly, so you won't see "salt and pepper" on the ingredient lists for these dressings.  Feel free to add your salt and pepper to the dressings, instead, if you like.  Also, I mix all my dressings in a little glass jar with a tightly fitting, screwtop lid.  If you don't have a jar, you could whisk the dressings together in a small bowl.  (But find yourself a little jar!  Really, it's quicker and, if you have leftover dressing, you can store it right in the jar you mixed it in.)

Basic Vinaigrette (adapted from Julia Child and Jacques Pepin, Julia and Jacques Cooking at Home):  Finely chop some garlic until you have about 1 tsp.  Add 1 TBSP Dijon mustard, 2 TBSP red wine vinegar, and 1/2 c olive oil.  Shake it up.  Taste and add more acid (vinegar) or oil, as you like.  Store in fridge up to 2 weeks -- just shake to re-blend before using.  If garlic isn't your thing, try grating a bit of shallot or onion.  (I use more than 1 tsp. when I use a shallot.)  Also, if you are really pressed for time, just skip the garlic/shallot. It's still good.

Lemon-Oil Vinaigrette (adapted from Julia Child and Jacques Pepin, Julia and Jacques Cooking at Home): If vinegar is a little too much acid for you, try this more delicate lemon juice-based dressing.  Mince or grate some shallots until you have about 1 TBSP.  Add 2 tsp Dijon mustard, 2 TBSP freshly squeezed lemon juice, and 1/2 cup olive oil.  Shake until emulsified. Taste. 

Walnut-Oil Vinaigrette (from the back of a bottle of walnut oil!):  4 TBSP walnut oil, 1 TBSP balsamic vinegar, 1 tsp Dijon.  Shake.  Serve with salads in which walnuts are a "savory" ingredient.  If the dressing tastes too strongly "nutty" to you, try it with half walnut oil and half canola oil.  I've also made this with hazelnut oil and it was great.  It's a nice change of pace from regular vinaigrettes. 

Add the dressing to your greens in small amounts -- start with just a TBSP or two.  Toss it gently with tongs.  Taste a leaf and add more dressing if needed.  Ideally, there should never be a pool of dressing at the bottom of your salad bowl.  The greens should just be glistening, lightly covered with dressing.

*Extra Credit:  Take Your Salad On a World Tour
.

When you're ready to venture beyond the sweet/savory formula, pick your favorite type of ethnic food and try to construct a salad out of the basic flavors of that cuisine.  A few examples:

Japanese:  (adapted from Rachel Ray, 30-Minute Get Real Meals)  The real star here is the dressing, a ginger-soy vinaigrette:  juice of 1 lime, generous 1 tsp Dijon mustard,  1 TBSP tamari (or soy sauce), 1 tsp ginger (bottled or grated fresh).  This is fabulous just on plain baby spinach.  If you have warm grilled chicken or portabella mushrooms, and a few TBSP of toasted sesame seeds, add any or all of them.  (Warm chicken or mushrooms will wilt the spinach a bit, and it's delicious!  Also, toasted sesame seeds are available in the Asian foods aisle.)

Greek:  (adapted from Rachel Ray, 30-Minute Get Real Meals)  This is the classic greek salad:  chopped tomatoes, cucumbers, and feta cheese.  No lettuce!  Dress with the juice of 1 lemon, a drop or two of hot sauce, 4 tsp olive oil and sea salt.  Want to take it up a notch?  Add red onion, kalamata olives, and/or a few peperoncini.  Top with chicken or maybe even grilled shrimp or sauteed scallops. If you want to serve it over greens, go with romaine.  Note:  wait til summer for this one!  The tomatoes are the main attraction here, and they won't be worth it until summer. 

Italian:  (adapted from Rachel Ray, 30-Minute Get Real Meals)  Everyone loves an antipasto salad at a pizzeria, right?  Well, it makes a great meal on its own, too.  Romaine lettuce, artichoke hearts, bottled roasted red bell peppers, peperoncini, kalamata (or other good quality olives), Genoa salami, provolone cheese, fresh mozzarella cheese, tomatoes.  Dress greens with about 1 TBSP red wine vinegar and about 2 TBSP olive oil. Top with fresh basil.


Mexican:  When you are craving Mexican food, but don't want something heavy with meat and cheese, a taco salad is a great choice.  I often serve a small version of this salad with the quesadillas I discussed last week.  Romaine or even shredded iceberg,  black beans (or kidney or pinto), avocado, shredded Mexican-blend cheese, fresh cilantro, a little lime juice, and/or tomatoes.  Use your favorite salsa for dressing.  If you are ready for a little more cooking, serve with roasted corn added in.  As you can see from the photo, I have a bit of an obsession with the roasted corn . . .

Enjoy! Sorry there aren't more photos . . . it's been raining cats and dogs all week, so I haven't been a salad mood!

M